Showing posts with label vintage. Show all posts

Sunday, March 1, 2015

The Perfect Hutch Makeover

Before the Makeover
Scott after sanding in the garage...Yikes
Now that our new barn wood table is finished (see earlier post) our 90's honey oak hutch needed a makeover.  So Scott started sanding it down, removed the mirrors and glass from the doors.  His goal was to have it done by Christmas and sure enough, he
made it!

The hutch was sanded, painted with a primer, then painted white with a satin paint.  Turqouise and red paint were painted randomly in splotches.


Elmer's glue was painted in random areas (for crackle effect) and then another coat of white was painted over everything.  Finally, a stain was painted over the entire piece.  The leaded glass panels were removed from the front doors and chicken wire replaced it.  The mirror was also taken out of the back and bead board was painted in the same process as the rest of the hutch and placed in the back of the hutch.


Come join the Link Party on...

I was featured on Remodelaholic

Wednesday, June 26, 2013

My Creative Week In Review

I decided to compile my latest creative projects in one post since summer is so busy.  We have been working a lot on our deck and our container garden, as you saw in my last post.  I decided I wanted some sheer curtains on the deck as well to shelter us a bit from the sun.  I am in love with my deck now!


Spicing Things Up...

I have a client that has lots of spices but had a boring little plastic lazy susan to display them but she has all these fun cake plates so I decided I would jazz things up in her kitchen by combining the different cake plates to display her spices.

Her whole house has a vintage vibe so these fit so perfectly into her 1950's style house.


Also...I finally have a Facebook Page!  Come like my page and you could win something cool and creative!


Lastly...but not least...my Chalkboard Obsession.  My kids have been after me to change the chalkboard so here is the newest one!


Saturday, April 20, 2013

Chalkboard Obsession & Creative Party Saturday!

Wow...I guess I was pretty busy this week with projects and posts.  I guess that is what snow will do to you...trap you in the house.

It's been a crazy month for snow here in Minnesota and this week was the worst!  It's been snowing since last Thursday...which a freak snowstorm in April isn't unheard of but a whole week of snow (over 12 inches) and it has been so cold.

 I keep shouting..."WHERE IS SPRING???"  

Each week I create a new chalkboard for my family.  My huge chalkboard is located in our dining room, so everyone sees it all the time and it has become a big deal to the kids to see it each week and contemplate over what it means.  Especially our 7 year old daughter, who isn't quite sure most of the time.  I try to find something that fits with what is going on with our family or can inspire the kids to greatness.

{ This weeks chalkboard is for my daughter, Megan, who just started
 her first job and will be starting Marching Band next week. }


**********************************************
Now... it is your turn...What have you been up to lately?  
Show me anything creative, I love to be inspired!

My rules are simple... Please start following me!
1. Share as many of your projects below as you would like...
2. visit other blogs that shared their projects...
3. comment if you would like.
4.  Grab a button...

lf you would like to be a co-host and grow your audience please email me: jennobyrne@gmail.com


Through My Creative Mind
<div align="center"><a href="http://throughmycreativemind.blogspot.com" title="Through My Creative Mind"><img src="https://blogger.googleusercontent.com/img/b/R29vZ2xl/AVvXsEi0hK9PdaIcgaY1LzzXNeltsuX71HOQK6tjM72L6Idql_3xWCI8GPgcUhEFkC8cCRE5dTBxkpTVvYokuQEUdHOQ8fXO4P-LYP_IBPuONKQUyeFiwLYK3RQZg2qCSZq104_Kb8tR2mz-VqfH/s220/chalkthumbnail.jpg" alt="Through My Creative Mind" style="border:none;" /></a></div>


Linked up on...
Funky Junk Interiors

Friday, March 15, 2013

Antique Lamp Globe Fix

My parents are big antique collectors and have lots of beautiful, BREAKABLE pieces throughout the house.  Several years ago, I was visiting my parents with my dogs and low and behold...the knocked a table and an old globe table lamp fell over and broke..EEK!

Last week I was down visiting them and my Mom pulled out the globe and some paint and wanted me to paint the globe.  She had already done the background color over the entire globe.  


Now...keep in mind, I haven't done this type of painting before, so this was all on a wing and a prayer.  I was very surprised that it didn't take me more than 2 hours and I think it turned out pretty good.  

Saturday, February 16, 2013

Suitcase Coffee Table

A month or so ago, Scott and I were out antiquing and going through a suitcase phase.  I found this suitcase for $12 and had to have it.  It was larger than most suitcase we were finding and thought it might work for a coffee table.  We just cleaned it up some and added some wooden legs from a hardware store and it works perfect!


Linked up on...

Funky Junk Interiors

PJH Designs

Sunday, January 13, 2013

Lamp...Repainted

OMG...I'm jumping up and down with excitement!  I found this plaster lamp at a thrift store yesterday for $10.00 with the lampshade and all!  It was pretty boring but I jazzed it up a bit today.


  1. Painted it with primer
  2. Painted it with a turquoise satin paint.
  3. Painted it with a dark stain and then rubbed it off with a cloth.
That is it...My new turquoise lamp!

Linked up on:


Saturday, January 12, 2013

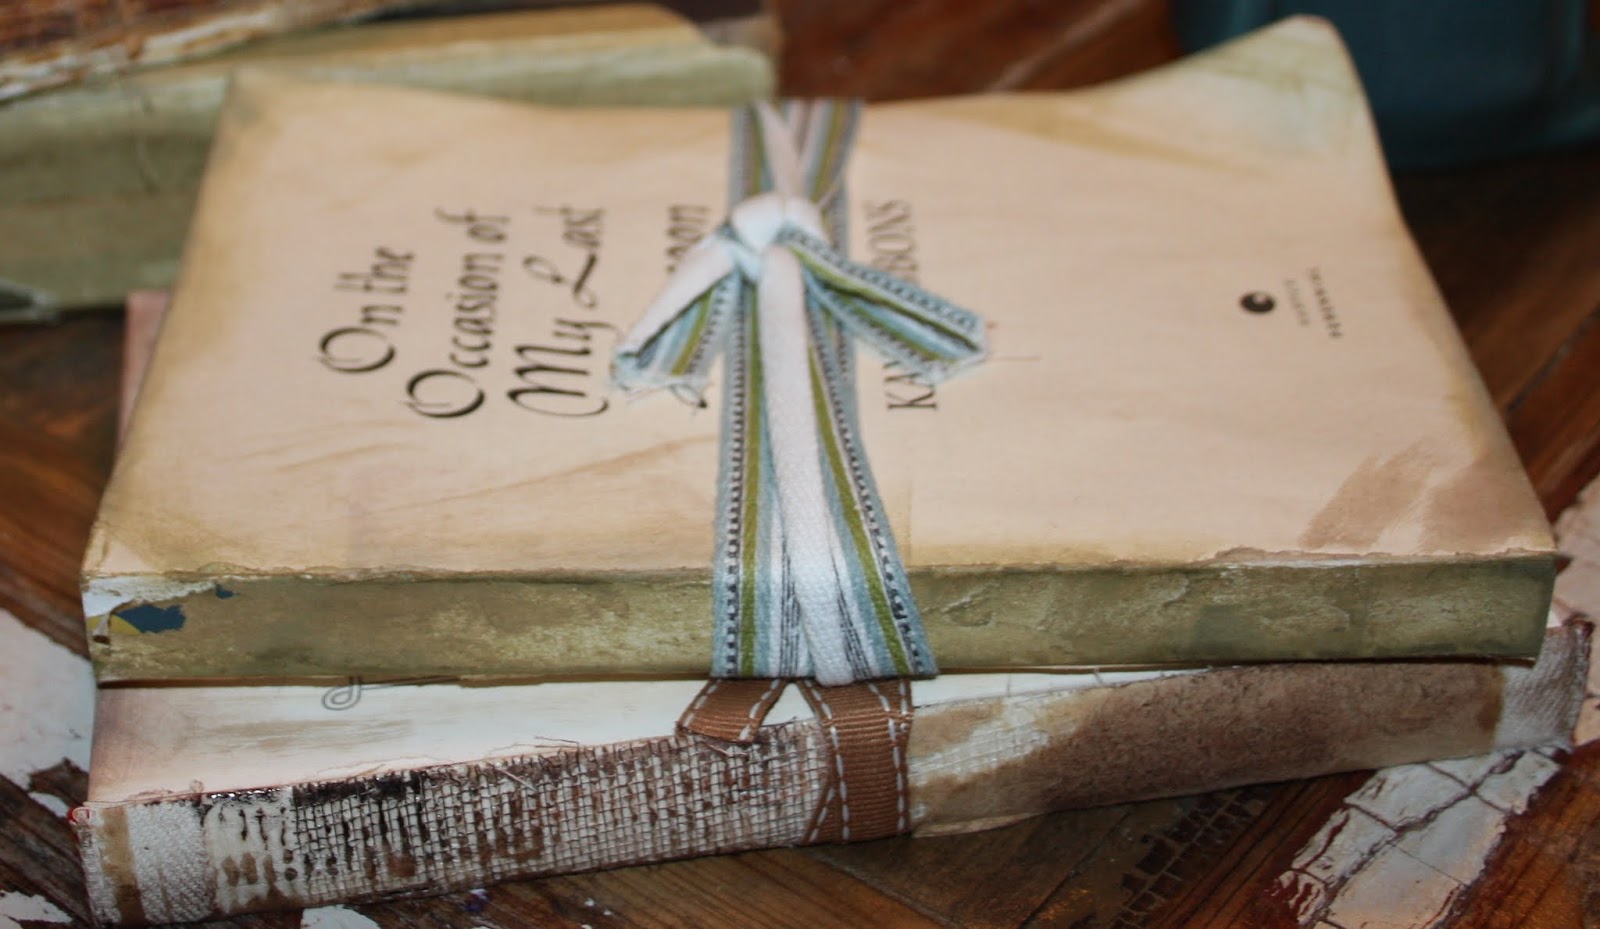
Jazz Up Old Books


On our thrift store hunt for a coffee table to fix up, I found this little gem for $2.49.  It is a vintage book called "The Blue Fairy Book".  I am not sure if this a first edition or not.  It isn't marked with a date but an owner did inscribe on the front cover 1923.

I loved the look of the book but the fairy story is what really sold me on it!
The book is a little beat up so I tied it up with some ribbons to keep the spine from being damaged further.

Here are a few other books I've jazzed up since they were damaged.

Sometimes the covers or spine are so damaged I can't save them so I have taken them off completely.


Thursday, January 10, 2013

Coffee Table Redesign

Scott and I enjoy rummaging through thrift stores and antique shops.  We are always looking for that back area that has the "less desirable" things.  Items that need work or could be re-purposed but don't look great right now.     


The way this piece came together was kind of strange because the timing of finding each piece was perfect.

We were in the back room of our favorite antique shop and found this cabinet.  It must have been in a workshop or garage under a built in desk area.  The top and sides were not finished but the underside was.  It was $25 and we loved the huge drawers and handles on it.  Scott looked at me and said..."Well, here is our new coffee table."  ok?  So we struggled to get it in the back seat of the car and brought it home.
We sanded it up and used a furniture wax to darken it and seal it.  We had no idea what we wanted for the top though, so we started throwing around ideas.  Barnwood? Glass? Hum.... 
A day or so after we found the cabinet, I stopped at a garage sale a couple blocks from home.  I found this huge frame for $5.00 so I decided to buy it.  At the time, Scott was obsessed with frames so I was excited to get it home and show him.  He was very excited to see how big it was and then thought...wow...it looks the same size as that cabinet.  He brought it into the living room and laid it on the cabinet and it fit perfectly!
The frame needed a little attention since it was metallic gold.  He painted it dark brown and then used a brillo pad to rub some of it off.  The frame had a picture in it that was printed on cardboard.  We were going to take it out since it was ballerinas in bright colored dresses.  Scott suggested we try to wax over it and see how it happened.  It was beautifully toned down and we kept it in the frame and screwed it down to the cabinet.

Voila...  Our new coffee table!


Linked up on:

Photobucket

Saturday, December 29, 2012

Monogram Frame

Scott and I love to go to thrift stores and little vintage shops around town to see what we can find to refinish or repurpose.  This is a plastic frame I found that I thought was very cool but a very ugly pea green.  Scott was not seeing my vision for it but I took a little time today to refinish it and make it into a monogram frame for our entry way.
You will need:
Frame
Turquoise craft paint
Elme'rs Glue
White Paint
Dark Wood Stain
Ribbon
Cardboard Letter
Paint Brushes

~ Paint the frame turquoise
~ Paint glue over areas that you desire to be crackled
~ Let glue become tacky...Don't let it dry too much!
~ Paint white over tacky glue. Let dry
~ Paint stain over desired areas and rub off with cloth
~Add embellishments


Tips:   Do small areas of glue so you don't feel rushed when painting over it.  Remember...Don't let the glue dry too much or it will not crackle.  If you want a little more color use a dry brush to add a little more color like I did on the top ornament and outside frame shown above.


Related Posts Plugin for WordPress, Blogger...